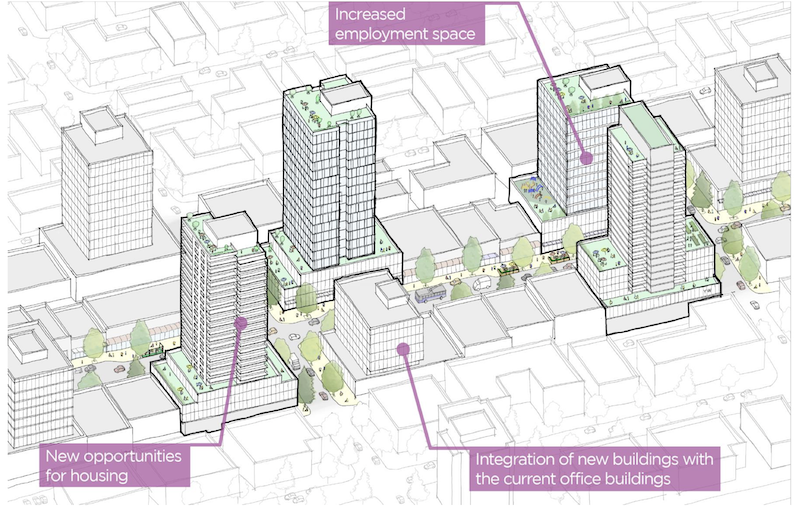
Skip to content
  • Home
  • Subscribe / donate
  • Events calendar
  • News
    • Local
    • National
    • Israel
    • World
    • עניין בחדשות
      A roundup of news in Canada and further afield, in Hebrew.
  • Opinion
    • From the JI
    • Op-Ed
  • Arts & Culture
    • Performing Arts
    • Music
    • Books
    • Visual Arts
    • TV & Film
  • Life
    • Celebrating the Holidays
    • Travel
    • The Daily Snooze
      Cartoons by Jacob Samuel
    • Mystery Photo
      Help the JI and JMABC fill in the gaps in our archives.
  • Community Links
    • Organizations, Etc.
    • Other News Sources & Blogs
    • Business Directory
  • FAQ
  • JI Chai Celebration
  • JI@88! video

Recent Posts

  • Story of Israel’s north
  • Sheltering in train stations
  • Teach critical thinking
  • Learning to bridge divides
  • Supporting Iranian community
  • Art dismantles systems
  • Beth Tikvah celebrates 50th
  • What is Jewish music?
  • Celebrate joy of music
  • Women share experiences 
  • Raising funds for Survivors
  • Call for digital literacy
  • The hidden hand of hate
  • Tarot as spiritual ritual
  • Students create fancy meal
  • Encouraging young voices
  • Rose’s Angels delivers
  • Living life to its fullest
  • Drawing on his roots
  • Panama City welcoming
  • Pesach cleaning
  • On the wings of griffon vultures
  • Vast recipe & story collection
  • A word, please …
  • מארק קרני לא ממתין לטראמפ
  • On war and antisemitism
  • Jews shine in Canucks colours
  • Moment of opportunity
  • Shooting response
  • BC budget fails seniors
  • Ritual is what makes life holy
  • Dogs help war veterans live again
  • Remain vital and outspoken
  • An urgent play to see
  • Pop-up exhibit popular
  • An invite to join JWest

Archives

Follow @JewishIndie
image - The CJN - Visit Us Banner - 300x600 - 101625

Byline: Shelley Civkin

An alternative to honey cake

An alternative to honey cake

Peach-blueberry cake à la Ina Garten, made by the Accidental Balabusta. (photo by Shelley Civkin)

With Rosh Hashanah right around the corner, I’m already thinking of honey cake … but not honey cake. Wanting to ring in the new year with something sweet but not traditional, I found a recipe that might just fit the bill perfectly. Looking around the stores, there is still lots of fresh fruit to be had and, in a final hurray to summer, I decided to indulge in the juicy sweetness of peaches and local blueberries. Add in a few dozen other ingredients and, voila, I produced a cake that my husband declared worthy of a Balabusta column. 

Reading the recipe I found online at sweetandsavourypursuits.com, I was initially apprehensive, since the ingredients list reads like a Tolstoy novel. Then I thought, heck, stop being a kitchen-weeny and get the job done. If the internet is to be believed (ha!), this recipe is “adapted from Ina Garten,” the “Barefoot Contessa,” so it was all but guaranteed to be good. And it was. However, I have one caveat: the baking temperature and cooking time are way off. But that’s an easy fix.

Made in a nine-and-a-half-inch springform pan, this cake has got legs. It’s gooey and sticky and holds its own. It’s the opposite of light and fluffy, but you don’t necessarily expect light and fluffy from a fruit-filled cake. Anyway, no more excuses. Just try it. But keep in mind that you will probably need to adjust your temperature up from the stated 350˚˚ F to about 365˚ F or even higher, depending on your oven. The recipe calls for a cooking time of 45 to 55 minutes at 350˚F, but the batter was still wet and jiggly after 55 minutes, so I upped the temperature and just kept adding time until the cake set, which ended up being more like an hour and 15 minutes or so. Flexibility is a must for this recipe. Don’t expect to make it when you’re in a rush. Won’t happen. But darn, it’s worth the time.

PEACH-BLUEBERRY CAKE

1/2 cup unsalted butter at room temperature
2 cups white sugar
2 large eggs at room temperature
1 cup sour cream at room temperature
1 tsp vanilla extract
2 cups all-purpose flour
1 tsp baking powder
1 tsp baking soda
1/2 tsp ground cinnamon
1/2 tsp ground cardamom (optional, and I didn’t use it)
2 large fresh ripe peaches, peeled, pitted and sliced
3/4 cup fresh blueberries rinsed and dried
1/3 cup light brown sugar packed
1/2 tsp ground cinnamon
1/4 tsp ground cardamom (optional)

1. Place rack in the middle of the oven and heat oven to 350˚ F (as I said above, I would recommend more like 365˚ F or higher – your call). Line the bottom of a 9 1/2” springform pan with parchment paper or lightly grease it. Set aside.

2. In a large bowl, sift the flour, baking powder, baking soda, salt, cinnamon and cardamom (if using). Set aside.

3. In the bowl of your mixer, add the butter and white sugar and beat on medium-high for 3 to 5 minutes, until mixture is fluffy.

4. Add eggs, one at a time, mixing after each addition.

5. Add the sour cream and vanilla extract and beat until smooth.

6. Scrape the side and bottom of the bowl before gradually adding the flour mixture on low speed.

7. Once the flour has been added, increase the speed and beat until the batter is smooth. Don’t over-beat the batter. 

8. In a medium bowl, mix the peaches and blueberries with the brown sugar, cinnamon and cardamom (if using).

9. Spread the batter evenly into the springform pan.

10. Add the fruit to the top of the batter by arranging the peaches in a circular pattern and scattering the blueberries in the gaps. (At this point, I was so tired, I just threw the whole fruit mixture on top of the batter.)

11. Bake for 45 to 55 minutes or until a toothpick inserted in the centre of the cake comes out clean or with a few crumbs clinging to it.

12. Cool the cake on a wire rack for 10 minutes before running a knife along the edge and releasing the cake from the pan.

The recipe says to serve the cake at room temperature, but who are we kidding? As soon as I could touch the cake without burning my fingers, I was stuffing it into my mouth. The recipe also suggested serving it with sweetened whipped cream or vanilla ice cream, neither of which I had, so we ate it au naturel.

The cake can be stored at room temperature for up to two days and, after that, it should be refrigerated. But, once again, who are they kidding? As if a cake would last two days in our home. Maybe we’re gluttons. Or maybe we just wanted the cake while it was fresh. My money is on freshness. And expediency.

However you parse it, this cake is summer-yummy. And, since I can already feel fall in the air, if I were you, I’d hightail it to your local grocer, buy some peaches and blueberries and get baking. The cake was delicious right from the oven. It was delicious the next morning for breakfast. And it was still delicious that afternoon. Now, it is no longer. I have no idea if it would freeze well or not, but, if so, it would make a refreshing alternative to honey cake for Rosh Hashanah. You could probably substitute berries of any kind in this cake, but I hear that blueberries are a particularly good antioxidant food. If, however, you happen to be pro-oxidant, then skip the blueberries and opt for something less controversial. Whatever. Just try this. Then thank me. 

Shelley Civkin, aka the Accidental Balabusta, is a happily retired librarian and communications officer. For 17 years, she wrote a weekly book review column for the Richmond Review. She’s currently a freelance writer and volunteer.

Format ImagePosted on September 13, 2024September 11, 2024Author Shelley CivkinCategories Celebrating the HolidaysTags Accidental Balabusta, baking, cake, Rosh Hashanah
Mousse and toasties, yum!

Mousse and toasties, yum!

Easy-peasy Vegan Chocolate Mousse served up in a teacup. (photo by Shelley Civkin)

I have to admit, I have a soft spot for Donna Reed-type recipes from the 1960s. Aside from being comfort food, they usually boast the honour of containing highly processed foods that are, well, a little short on nutrition. But do they taste good!

One such recipe comes from my cousin Heather. The name says it all: Artichoke Toasties. It appeals to the lazy cook in me because it only has seven ingredients, five of which I always have in my kitchen. But it’s also a surprisingly creamy, crunchy and satisfying appetizer. And, it’s pretty filling too, so you can get away with serving a lighter dinner. Always looking for shortcuts.

ARTICHOKE TOASTIES

12 slices white bread
butter
1 14-oz can artichoke hearts, drained and finely chopped
approx. 1/4 cup grated parmesan cheese
3 heaping tbsp mayonnaise
pinch of salt and pepper
1 clove crushed garlic

Preheat oven to 425°F. Use a drinking glass (2” diameter) to cut circles of bread out of each slice. Butter one side and press the buttered side down into a greased muffin pan, flattening the entire surface. Mix the remaining ingredients together and place a spoonful of the mixture into each bread “bowl.” Bake 12-15 minutes, until golden and crisp. Cool briefly before removing them from the pan.

Not only is it a fun presentation, but it satisfies that salty, cheesy craving we all get now and then. I never promised anyone a low-calorie, highly nutritious, gourmet meal, but I always hope to deliver something yummy.

My next recipe is a no-brainer dessert that will have your partner or guests convinced you went to French culinary school. It’s called Vegan Chocolate Mousse, and it tastes like a fancy-restaurant dessert made with the finest Belgian chocolate … the kind you’d eat while wearing high heels and diamond earrings. Best part is that it’s ridiculously simple to make. As in, it take five minutes. Seven, if you really go nuts with the blending. I never thought a recipe that starts with the word vegan would draw me in, but, hey, first time for everything. You’re welcome.

EASY-PEASY VEGAN CHOCOLATE MOUSSE

1 can (13.6 oz) full-fat coconut milk (or coconut cream) chilled overnight
1/4 cup + 1 tbsp cocoa powder
3-4 tbsp powdered sugar
1 tsp vanilla extract
2-3 tbsp liquid from the can of coconut milk
1/2 tsp instant coffee or 1/2 banana (optional)
fresh berries for topping (optional)

Refrigerate the can of coconut milk (or coconut cream) overnight. Be sure to use full-fat canned coconut milk for this recipe – and do not shake the can, because you want the cream separate from the liquid underneath.

Once cold, open the can of coconut milk and transfer only the thick cream part to a bowl. Keep 3 tablespoons of the watery part and discard the rest (or freeze it for later use).

Whip the coconut milk (or coconut cream) until smooth. Add remaining ingredients and whip until it forms a mousse-like texture. Spoon into ramekins or small bowls and chill for a few hours or up to overnight. For a unique and kitschy presentation, I served the mousse in old-fashioned teacups.

Top with whipped cream and raspberries or blueberries, if you’d like.

There is a pronounced but not overwhelming coconut flavour to this mousse, however the cocoa powder dominates the palate. I made this recipe recently and, as I dragged my spatula towards the finish line, I had a strong feeling this was going to be a top contender in my dessert repertoire. Sure enough, it was a huge hit with my guests. As for my hubby, after the first bite, his eyes glazed over and he went into a trance-like state. Then, he came to and hoovered up the rest of the mousse in 30 seconds flat.

Be aware that this recipe only produces three good-sized portions or four scant ones. Given how popular it was, I would likely double or even triple the recipe next time. This was hands-down the easiest, fastest and least expensive dessert I’ve ever made.

One another note … along the way on my culinary adventures, I’ve stumbled upon a few new-to-me kitchen hacks. These tricks eliminate mess, rescue flavours and are just kind of cool, so I thought I’d share.

Dental floss

When you’re slicing certain creamy foods like cheesecake or goat cheese, give plain dental floss a try. It’s thin, so it doesn’t create drag, like the blade of a knife does, and the slices come out clean with just a simple pull of the floss. Caveat: don’t use flavoured dental floss or your cheesecake or goat cheese may come out tasting like mint. Regular, thin, waxed floss will do the trick.

Stop pot from boiling over

When you’re boiling anything on the stove, the quickest way to stop it from boiling over is to put a wooden spoon across the top of the pot. Don’t ask me why this works, it just does. Every time. I think the wood absorbs the steam. But don’t try this with a silicone spoon.

Rescue a salty soup

Next time you mistakenly oversalt a soup, toss in a few pieces of raw apple or potato. Simmer for 10 minutes then discard the pieces. The apple or potato absorb the salt like little sponges.

My best hack

My favourite kitchen hack by far though is this: eat out! Or, stay home and stuff your piehole with artichoke toasties and vegan chocolate mousse. 

Shelley Civkin, aka the Accidental Balabusta, is a happily retired librarian and communications officer. For 17 years, she wrote a weekly book review column for the Richmond Review. She’s currently a freelance writer and volunteer.

Format ImagePosted on July 12, 2024July 10, 2024Author Shelley CivkinCategories LifeTags Accidental Balabusta, cooking, kitchen hacks, recipes
Sparks of joy found in downsizing

Sparks of joy found in downsizing

The City of Vancouver’s Broadway Plan includes different ideas for different areas. This image shows the general intention for Broadway’s shoulder areas. (image from vancouver.ca)

Assuming you haven’t been hiding under a rock for the past many years, you’re probably familiar with Marie Kondo. For those of you boulder-hiders, she’s the author of The Life-Changing Magic of Tidying Up: The Japanese Art of Decluttering and Organizing. I think she’s also the genius who coined the term “spark joy.” As in: “If it doesn’t spark joy, get rid of it.” While I’d bet the farm that this thought has crossed the mind of many a wife over countless years of marriage, I believe what Kondo is referring to is the stuff that clutters our home. And, by “stuff,” I don’t mean husbands. Although, if the shoe fits….

Speaking of clutter, my husband and I recently got a shock. The apartment building I’ve been living in for the past 37 years (and Harvey’s home for the past 18 years) is on the chopping block, thanks to the City of Vancouver’s Broadway Plan. The city has ever so kindly put up a huge sign on the front lawn of our building with the jazzy-looking redevelopment plan. What is currently a quaint three-storey apartment from the 1970s is soon to become two high-rise towers (19 and 20 floors, respectively) with retail below.

This whole situation is not sparking a lot of joy. If I’m being completely honest, it’s pretty much just sparking a whack load of anxiety. Currently, we are paying the lowest rent on the planet for a large two-bedroom apartment. We will soon be faced with finding a similar-sized apartment that will easily rent for two to three times as much. Did I mention that we’re both retired? This is no pity-party; it’s just a reality that is sparking the opposite of joy.

On the topic of sparking joy, though, I am now in the process of downsizing, in preparation for having to move. Frankly, I’m surprised by the dearth of joy that is sparked as I go through 37 years’ worth of stuff. Like many of my contemporaries, I was gifted loads of my parents’ old possessions when they downsized from a house to a condo to an apartment. I’m now realizing how popular teak was in the 1960s. And, surprise of surprises, it’s making a comeback. Which brings me to Facebook Marketplace, where I am divesting myself of myriad useless possessions. One man’s trash is another man’s treasure, and all that. Turns out, my trash is pretty lucrative.

What I’m learning through this experience is that there’s very little that sparks joy for me anymore. Let me clarify. My family and friends spark a great deal of joy. My community sparks a lot of joy. But does my mom’s 1958 aluminum roasting pan spark joy? Hard no. Likewise, their teak serving tray that once did yeoman’s service at cocktail parties. No joy there. However, the Gen Zs around town think it’s a new invention and are willing to pay top dollar for it. As witnessed by the bidding war it sparked on Marketplace when I listed it. I’m continually amazed by what people will buy: used barbells, wooden boxes, old clothes, eight-year-old computer keyboards and cordless mice, and on and on. I even sold the toilet riser I bought after I had knee replacement surgery last year. (All cleaned, of course.) To date, I have sold enough stuff to buy a brand-new high-end kitchen appliance. But not enough to buy a designer puppy. Or a Honda CR-V. But still.

In the process, I have acquired a new-found appreciation for simplicity and minimalism. Decluttering has become my BFF. Never thought I’d say those words. A true dyed-in-the-wool packrat, this whole experience has been eye-opening. And, believe me when I tell you that my decluttering is sparking a tremendous batch of joy for my husband Harvey, who likes things tidy. There are areas of our apartment he’s never even seen before. “We have a walk-in closet?”

As I throw myself body and soul into my new mission, I realize it’s taking a toll on my balabustaness. I’m so focused on getting rid of things that I sometimes lose track of time. “Oops, it’s dinnertime already? Guess we’ll just have to order in.” I have (in my head) committed to homemade meals at least five days a week. The other two days are catch as catch can. Read: tuna melts, scrambled eggs or takeout. OK, read: takeout. We’re supposed to be supporting the economy, right?

On the topic of balabustaness and cooking, did I mention that, due to health challenges, my husband has to be on a strict low-salt diet? And he also has to avoid high-potassium foods. Which makes being the Accidental Balabusta way less accidental. I’m practically the Intentional Balabusta now. But, oh, how I love a challenge. Think DASH diet, blah, blah, blah. Which is exactly how low-salt or no-salt food tastes. Blah, blah, blah. Consequently, I’ve enlisted countless heads of garlic, jars of spices and armloads of herbs. Onions would solve multitudinous culinary conundrums, except that onions and I are not on speaking terms. 

As I scour the internet for low-salt recipes that don’t taste like sawdust, I am truly underwhelmed. Surely, we’re not the only family who is sodium-challenged yet appreciates flavourful food. Maybe we are. If anybody out there in Balabustaland has some delicious low-sodium recipes, please feel free to share with me.

On another health-related note, my husband recently had prostate surgery, and I’ve been given to understand that high-protein foods promote healing. Thing is, his appetite has diminished quite a bit since his surgery. He’s asking for light comfort foods, like eggs and soup. When I inquired what kind of soup he fancied the day he got out of hospital, my humorous hubby replied: “Leek.” I chose not to dwell on that unfortunate pun. He may have had his prostate removed, but he certainly hasn’t had a humour bypass. I settled on chicken soup. 

But, like Harvey said, there’s a lot of humour in this whole prostate situation, if you ignore the pain. For instance, at Harvey’s first post-op visit to our GP, the doctor asked how Harvey’s was doing. To which Harvey replied: “Depends.”

Stay tuned for more on decluttering, salt-free cooking and, well, probably leakage. To those of you who have a urologist on speed dial, urine good hands.

I’ll see myself out. 

Shelley Civkin, aka the Accidental Balabusta, is a happily retired librarian and communications officer. For 17 years, she wrote a weekly book review column for the Richmond Review. She’s currently a freelance writer and volunteer.

Format ImagePosted on March 8, 2024March 7, 2024Author Shelley CivkinCategories LifeTags Accidental Balabusta, Broadway Plan, City of Vancouver, development, Facebook Marketplace, Marie Kondo
Don’t let your lemon loaf

Don’t let your lemon loaf

Lemon loaf using a recipe by Jo-Anna Rooney, creator of A Pretty Life in the Suburbs. (photo from aprettylifeinthesuburbs.com)

So, a husband walks into Costco … with no shopping list. And what happens? He comes out with $200 worth of steak, a 10-pound bag of lemons (which, by my calculations, will make about 300 whiskey sours), 12 jars of capers, eight boxes of latex gloves, a snow blower, two big boxes of chocolate truffles and 98 rolls of toilet paper.

I am left wondering: what the hell am I supposed to do with a snow blower? We live in an apartment in Vancouver. And we’re not the caretakers. I ask my husband, “What’s up with the snow vehicle?” He just shrugs. Like, maybe he plans on relocating us to Winnipeg? “It was on sale,” he says. 

I continue my interrogation. “So, are you planning to resell it on Facebook Marketplace, since you have it on good authority that there’s going to be a monstrous snowstorm coming to Vancouver? Or did you buy it as a gift for our cousins in Michigan?”

Just when I think he’s going to take up the challenge of my inquest, he demurs. I guess it’s not the snow hill he wants to die on.

My very next thought is: what the heck am I supposed to do with 10 pounds of lemons? Don’t say “make lemonade,” because, well, that’s seasonal. I consult with my BFF, Google, and she tells me that the best thing I can do with lemons is make lemon loaf. By now, she’s figured out that I love old school recipes. Being the compliant (and lazy) baker that I am, I gather my ingredients and have at it. Despite that it’s a classic 1960s/1970s dessert, I’ve never made it before. But, since everyone tell me a chimpanzee could make it (like that’s supposed to make me feel better about myself), I can hardly sidestep the challenge. 

Long story marginally shorter, my husband and I demolished the whole lemon loaf in less than 24 hours. OK, make that 12 hours. I’m pleading the fifth. Wow, look what I just did with the math there. Anyhow, I baked, I fought, I ate. The fighting came into play when the last piece of lemon loaf was left.

LEMON LOAF
(a recipe by Jo-Anna Rooney)

1/2 cup butter (or margarine)
1 cup granulated sugar
2 large eggs
1 1/2 cup all-purpose flour
1 tsp baking powder
1/4 tsp salt
1/2 cup milk
zest of 1 medium lemon (but not the juice)
**
juice of 1 medium lemon
1/4 cup granulated sugar

Preheat oven to 350°F and then prepare an eight-inch-by-four-inch loaf pan by lining it with parchment paper. Set it aside.

With a mixer, cream together the butter and sugar. Add in the eggs, one at a time.

In a separate bowl combine the flour, baking powder and salt. Add half of the flour mixture to the butter mixture. Then add half of the milk. Add the remaining flour mixture. Mix in the remaining milk and lemon zest. Bake for 45-55 minutes, or until a toothpick inserted into the centre comes out clean.

While the cake is baking, combine the juice from one lemon with 1/4 cup granulated sugar.

When the cake is baked, take it out of the oven and pierce holes in it with a thick bamboo skewer or a sharp knife – make sure to pierce to the bottom of the loaf so the lemon juice mixture can get right down into the cake. Pour the lemon juice/sugar mixture over the warm cake. Let it sit. This cake is even better the next day, and there is no need to refrigerate it.

Tip: I used parchment paper, like the recipe called for, but, next time, I’d just grease the loaf pan and bake it that way. The parchment paper allows for easier removal from the pan so that you can present it prettily on a plate, but who are we kidding, it won’t last a day, so just eat it straight out of the loaf pan. You’re welcome.

After I made the lemon loaf, I realized it was almost time for dinner. Not feeling particularly inspired, I browsed through my mother’s old National Council of Jewish Women Cookbook from the 1960s, hoping for a quick fix. Honestly, I have no idea how housewives raising families in the ’50s and ’60s managed to come up with a different dinner day in and day out for decades. Donna Reed, with her poodle skirt and kitten heels. How did she do it? I can only surmise that she wasn’t serving Michelin Star meals every night. It was probably more like shepherd’s pie, liver and onions, fish sticks or TV dinners (if the kids were lucky). Then I saw it: tuna noodle casserole! Thankfully, it wasn’t my mom’s version, which tragically included chow mein noodles and canned mandarin oranges on top. I want to gag just thinking about it. My version was neat but not gaudy, and it practically made itself. Once again, you’re welcome.

TUNA NOODLE CASSEROLE

2 cans of tuna fish
1 can of mushroom soup
approx. 1 cup frozen carrots and peas
approx. 1 cup grated cheese (any kind)
pasta of your choice (enough for a few people)
Panko crumbs
salt & pepper to taste

Preheat the oven to 400°F. Boil pasta as per the package and grate the cheese.

Once the pasta is ready, drain the water and add the mushroom soup, tuna, peas and carrots, and salt and pepper. Mix it all together. Pour it into a large casserole dish and top it with the grated cheese and Panko crumbs. Bake for about 20 minutes or until the cheese bubbles and gets slightly brown.

Sure, you could fancy this up using Gruyere cheese and organic, gluten-free pasta, with chopped up fiddlehead greens instead of carrots and peas, but, seriously, why would you want to? Stick to the KISS principle – keep it simple, silly. The proof is in the pudding: my husband and I both loved it. Judging by how he hoovered it down, he probably wouldn’t mind if I made it at least once a week. Hmm … maybe that’s why he just bought 36 cans of tuna at Costco.

I’m fully aware of how unsophisticated this recipe is but, hey, I never claimed to be a connoisseur of food. I did, however, claim the title of accidental balabusta. And it fits, right? Bon appetit! 

Shelley Civkin, aka the Accidental Balabusta, is a happily retired librarian and communications officer. For 17 years, she wrote a weekly book review column for the Richmond Review. She’s currently a freelance writer and volunteer.

Format ImagePosted on January 26, 2024January 24, 2024Author Shelley CivkinCategories LifeTags Accidental Balabusta, baking, cooking, lemon loaf, recipes, tuna casserole
Cookies and muffins for fall

Cookies and muffins for fall

Peanut cookies are so good, it’s hard to keep a batch around once you get a whiff of them. (photo by Shelley Civkin)

I’m definitely my happiest when it’s blueberry season in Vancouver. You know what I’m talking about – those huge, sweet, juicy blueberries grown in British Columbia in July and August. I can’t get enough of them, and end up putting them in salads, quinoa dishes, smoothies, breakfast foods and, of course, desserts. I often get overzealous and buy several pounds of them at once. Since there are only two of us to feed, I end up freezing loads of them, knowing that they’ll be reincarnated into something delicious in the months to come. Enter one of my faves.

LEMON BLUEBERRY CORNMEAL MUFFINS

1/2 cup butter, softened
3/4 cup sugar
2 eggs
1/2 tsp vanilla extract
1 tbsp lemon juice
1 tbsp grated lemon zest
1 1/4 cup flour
1/4 cup cornmeal
1 tsp baking powder
1/2 tsp baking soda
1/2 cup milk
3/4 cup blueberries

Preheat oven to 350ºF. Cream the butter and sugar. Add eggs, one at a time, and beat well after each addition. Beat in vanilla, lemon juice and lemon zest. The mixture may look curdled, but that’s OK.

In a separate bowl, reserve one tablespoon of flour for the berries later on. Combine remaining flour, cornmeal, baking powder and baking soda.

Add dry ingredients to butter mixture alternately with milk, beginning and ending with dry ingredients.

Toss reserved tablespoon of flour with berries and stir it into batter gently.

Pour batter into muffin tins (use cupcake liners) and bake for 25 to 30 minutes, or until golden brown on top. Test for doneness using a toothpick.

These have always been a crowd pleaser and, even though they’re nothing fancy, they’re really yummy, especially served warm – with a big glob of butter. They freeze nicely, too. Pair it with a London Fog tea and you’re all set.

My next favourite snack is not exactly fancy-shmancy, but who cares. Call me plebeian, but I’m a sucker for a peanut butter cookie. They’ve got a lot going for them besides the protein that the peanut butter provides (that’s my nutritional pronouncement and I’m sticking to it). They’re dead easy to make and everyone loves them. Well, except people who have peanut allergies. Grill your guests before serving.

PEANUT BUTTER COOKIES

1 1/2 cup all-purpose flour
1/2 cup butter, unsalted (or substitute margarine)
1 cup peanut butter
1/2 cup brown sugar
1/2 cup white sugar
1 tsp vanilla extract
1 large egg, at room temperature
3/4 tsp baking powder

Preheat oven to 350ºF. Sift flour and baking powder together then whisk to combine.

Cream butter and sugars together. Add peanut butter and mix until incorporated. Mix in egg and vanilla extract then add flour mixture and beat until incorporated.

Roll dough into one-inch balls and place on a baking sheet lined with parchment paper. Flatten cookies with a fork in a criss-cross pattern.

Bake cookies for 12 to 14 minutes, depending on whether you like them soft or crispy. Allow cookies to cool completely on the baking sheet, as they need to set before being transferred to a plate – or your mouth.

Peanut cookies are probably one of the oldest, most basic cookie recipes around, but they’re just so darn good, it’s hard to keep a batch around once you get a whiff of them. Pair them with a glass of milk, and you’ve got perfection right there in front of you.

My next cookie recipe is a bit unusual, and not terribly sweet, but, once you eat a couple of them, you’re addicted. A former colleague gave me the recipe for these tahini cookies.

TAHINI COOKIES

1 cup butter
1/2 cup white sugar
1 tsp vanilla extract
1/2 cup tahini
1 1/4 cup all-purpose flour
1/2 tsp baking powder
A couple of dashes of cinnamon (optional)

Preheat oven to 325ºF. Cream together butter and sugar until fluffy. Add vanilla and tahini and mix until well combined.

In a separate bowl, sift together the flour and baking powder, then stir it into the butter mixture. Drop tablespoon-size dough onto a baking sheet lined with parchment paper. Flatten the dough out a bit. If you make them too thick, they tend to taste doughy.

Bake until they turn golden brown, anywhere from 15 to 25 minutes. Cool on cookie sheet for 10 to 15 minutes before removing them to a wire rack or plate.

The flavour is somehow more sophisticated than, say, a chocolate chip cookie, so they might not appeal to a younger palate. Or they might, who knows. The minimal sugar, coupled with the nuttiness of the tahini, produces a seductively addictive cookie. Don’t say I didn’t warn you.

My husband recently pointed out that, since the weather has cooled, I’ve started nesting. Consequently, we’ve been eating a lot more soups, homemade challah and desserts. Not that he’s complaining. My waistline, on the other hand, is putting up a gallant (but losing) fight. I’m just plain weak-willed when it comes to homemade baked goods. I console myself with the fact that winter hibernation will be that much easier with extra poundage on board. Luckily, my new jeans have Lycra in them.

While I’ll be busy stuffing my pie-hole with cookies, I’ll be flipping through Netflix looking for the next K-drama series to binge watch. Have I mentioned that I might have a teeny-tiny addiction to K-dramas and K-romances? If you haven’t yet been introduced to Korean TV series on Netflix, do yourself a favour and try some. The acting is superb, the storylines are satisfying, and there is very little sex (unlike American TV and movies), which I find quite refreshing. The romance is chaste and sweet.

The Israeli student who I tutor English to online via Zoom introduced me to K-dramas, and the rest is history. We talk about them each week and swap suggestions for new series to watch. Not exactly what I thought I’d be talking to my student about, but it seems to work, and she gets to practise her English conversation skills. Win-win.

Allow me to recommend a few of my favourite K-dramas: Our Blues; Prison Playbook; The Good Bad Mother; Itaewon Class; It’s Okay to not be Okay; Extraordinary Attorney Woo; Hometown Cha-Cha-Cha; D.P.; King the Land; Something in the Rain; Divorce Attorney Chin; Crash Landing on You; One Spring Night; and Run On. Enjoy your fressing and viewing. You’re welcome.

Shelley Civkin, aka the Accidental Balabusta, is a happily retired librarian and communications officer. For 17 years, she wrote a weekly book review column for the Richmond Review. She’s currently a freelance writer and volunteer.

Format ImagePosted on October 12, 2023October 14, 2023Author Shelley CivkinCategories LifeTags Accidental Balabusta, baking, cookies, muffins, recipes

Recovery from surgery

Don’t let anybody tell you that recovery from knee replacement surgery is a walk in the park. It’s more like a hobble through hell. A very slow, frustrating, hobble with plenty of hurdles, pain and frustration. But, also, gradual victories and milestones.

My journey started off a bit rocky. One week before my knee surgery, I was diagnosed with severe sleep apnea and had to get a CPAP machine. Getting used to that is like getting used to having someone hold a pillow over your face while you sleep. And the apparatus itself – think Hannibal Lecter. Three weeks after my knee surgery, I had a bowel obstruction and landed back in the hospital for a couple of days.

As for the actual knee surgery, I had a spinal anesthetic and a nerve block. They also gave me conscious sedation, which, quite frankly, was my new best friend. Until I felt the surgeon cut into my leg, heard the electric saw they use to cut the thigh and shin bones, and felt the hammering. An unnerving experience, to say the least, and not one I’d care to repeat.

After surgery, in the recovery room, a young woman with black-and-green hair came over and announced that she was going to take an X-ray of my knee. As she leaned over me, the lanyard around her neck swung near my face. The strap on the lanyard said “Vancouver City Morgue.”  I looked around, paused for a second, and said: “So, is this what hell looks like?” She corrected the misunderstanding and said the lanyard was a joke. I suggested she might want to remove it, lest she scare the next unsuspecting patient.

As for the process of recovery – I realize that each person’s journey is different and the most important piece of advice I can give someone going into knee surgery is this: do not, I repeat do not, compare your progress to others. While some well-meaning physiotherapists and other medical professionals suggested I might want to join a Facebook support group for people who’ve had knee replacement surgery, I strongly advise against this. There are people who will boast that they achieved a 90-degree bend in their knee two days after surgery, while others will bemoan the fact that it’s been 12 weeks and they still don’t have a 90-degree bend. Everyone heals differently and comparing yourself to others will only make you feel crummy. I speak from experience. Don’t do it.

Full recovery from a knee replacement is slow – they tell you it takes anywhere from six months to a year. If you’re an impatient patient like I am, it can be hard. Take the wins where you can, be thankful for every small step forward, celebrate the successes along the way.

Part of every knee replacement is the post-surgery physiotherapy. If I had to compare it to something, it would be like having a 350-pound bodybuilder sit on your newly operated knee, while bench pressing a Ford F-150 full of cement. It is the polar opposite of a pleasant experience. My physiotherapist happens to be a tiny but extremely muscular and strong woman. She’s only doing what she’s been trained to do but, from my perspective, it’s pure torture. Her goal is to get you mobile, bending your knee and active as quickly as possible. Even if that means making you cry and scream during your half-hour sessions. I always thought I had a fairly high pain threshold, but she blew that theory out of the water right at the get-go.

To be clear, I am the most compliant patient anyone could ask for. If my physiotherapist tells me to exercise two to four times a day at home, I do it. Sometimes, it pays off, sometimes it doesn’t. That’s where the frustration comes in. But then you get to a certain point where you wake up one morning and you think, “Hey, I can do the stairs more easily now. How did that happen?” To be sure, there are countless ups and downs during the recovery. The trick is to keep your eye on the prize and know that, at the end of it all, you’ll have a knee that no longer locks or gives out on you.

Recovery would have been much harder had I not had an incredibly devoted husband who did nothing but take care of my every need for more than two months. From helping me shower to doing all the grocery shopping, cooking, cleaning, laundry, driving me to physio and doctor appointments, running errands, and taking care of many other things, Harvey was my rock. He never complained but, not surprisingly, he was exhausted. He’s 74 years old and has some medical issues of his own. More than once I suggested we get a cleaning lady, or do more food takeout, but he wouldn’t hear of it. He recently relented on the food takeout, I’m happy to report.

Here are a few things I’ve learned from this whole experience:

  • Give people what they need and want; not what you think they need and want.
  • Always express your gratitude for kind gestures, large and small.
  • Pay the kindness forward wherever and whenever you can.
  • Use whatever resources are available to keep calm, distracted and positive during the recovery process.
  • You don’t need to fight every fight. Choose your battles and conserve energy.
  • Help others as you would want to be helped.
  • Struggle is optional.

At age 67, I feel like the past few years, with their accompanying health challenges, have been one long audition for old age. Turns out there’s good news and bad news. The good news is that the audition is over. The bad news is that I got the starring role.

Shelley Civkin, aka the Accidental Balabusta, is a happily retired librarian and communications officer. For 17 years, she wrote a weekly book review column for the Richmond Review. She’s currently a freelance writer and volunteer.

Posted on September 22, 2023September 21, 2023Author Shelley CivkinCategories LifeTags Accidental Balabusta, health, knee replacement, recovery, surgery
Homemade fun food & toys

Homemade fun food & toys

Healthy food can make for a fun snack. The website hello, Yummy has lots of ideas about cooking for and with kids. This banana car with strawberry wheels and a graham cracker bear driver is but one option. (photo from helloyummy.co)

If I had a dollar for every time I heard a parent tell their kid to stop playing with their food, I’d be a very rich woman. I might even be able to afford a kosher prime rib roast. That being said, I’m here to tell you that sometimes it’s perfectly acceptable to play with your food. Like when there’s a banana strawberry car involved. Or maybe some peanut butter.

Anticipating the visit of my grand-nephew and grand-niece got me thinking about how we could have some fun together in the kitchen – without sending anyone to hospital or having to move afterwards. The 3-year-old, Raphael, loves to help his mom cook and bake, so I figured this would be the perfect way to bond with him. His 1-year-old sister, Ariel, might not be adept enough for the culinary process, but I’m sure she’ll eagerly participate in the finished product.

I think we can all agree that food is more fun when you can play with it. It brings out the inner kid in us, the one who’s just dying to squish mashed potatoes through our teeth. Unseemly behaviour for an adult? Sure. Have we all done it? You betcha. And who among us hasn’t rolled Wonderbread into soft little balls? The fact that edible toys are, for the most part, healthy, is a win-win. You just need to make good food choices.

For the super-fun banana car snack I found online (helloyummy.co) all you need is a banana, a couple of strawberries, some peanut butter to attach the “wheels” to the body of the banana car and a graham cracker “driver” (an animal cracker hippo or elephant works perfectly well, too). As for the strawberry “wheels” you could replace them with thick slices of kiwi, mango or even grapes. If you really want to get decadent, you could dip the banana wheels into melted chocolate, add a red licorice tailpipe, or tuck some raisins or blueberries into the “wheels” to simulate hubcaps. The possibilities are truly endless.

While the original recipe calls for using toothpicks to attach the wheels to the body of the car, I’m hesitant to do that, considering there’s a 3-year-old and a 1-year-old involved. It’s a foregone recipe for disaster.

Instead, I’m sticking with peanut butter as the adhesive (a glob of cream cheese could also work in a pinch). And, yes, I checked with their mom first to make sure neither of them is allergic to peanuts. Given that both kids were practically weaned on Bamba (the peanut-flavoured melt-in-your-mouth Israeli snack food), I figured I was safe on that count, but it’s always good to check with the parents.

Since I’m not sure of the practical play factor of these banana car snacks, there won’t be any makeshift racetracks as part of this edible experiment. (Will the wheels even turn? I doubt it.) Although I did see lots of great ideas on Google and Instagram.

Lucky for me that little Raphael and Ariel are the opposite of picky eaters. In fact, they’ll pretty much devour anything in sight. It doesn’t matter how esoteric, spicy, slimy, crunchy or smelly it is, they’re game to try it. And, if you transform the food into some kind of  insect, animal or character they recognize, even better. All it takes is a bit of ingenuity and some basic foodstuffs. The look of sheer wonder on a kid’s face when they see an insect made out of celery, apples and pretzels, and then you tell them they can eat it – well, nothing beats that.

So, go ahead and play with your food, make mealtime and snack time fun, and let your imagination soar. It’s unquestionably a healthier choice than plopping kids down in front of a screen, plus it encourages innovation, resourcefulness and artistic expression.

Aside from fun food snacks, I’m a bit addicted to Instagram for all the cool DIY toys you can make for toddlers and preschoolers using nothing more than leftover paper towel rolls, ping pong balls, a plastic straw, a bit of tape and some kids scissors. As a former children’s librarian, I have all sorts of craft tricks up my sleeve, and I love the uniqueness of homemade toys. But I definitely need a craft refresh now and again.

I’m always a little disheartened by the number of adults whose go-to gifts involve ordering overpriced toys online. I know that not everyone has the time or inclination to make a gift, but I sometimes think our culture has just gotten lazy. And how many times have you seen a well-intentioned adult (with a lot of disposable income) buy a 2-year-old a $75 toy only to have the kid show more interest in the box or the bubble wrap? Expensive does not always equate to fabulous toys. Put some time and thoughtfulness into it, and I guarantee your DIY gift will be memorable.

The second summer of the pandemic, I made a bunch of felt animals for then-2-year-old Raphael and, according to his parents, he loved them. He’d stick them on any surface within reach, and they were a great way to learn animal names and have fun doing it. I’m not saying they were newsworthy, but they were all handmade with love.

And making them was not as onerous as you might think. Just find some free templates on Google, print them out, buy some felt and glue at the dollar store, do some tracing, and boom – you’ve got yourself some mighty fine felt board animals. Aside from putting them on surfaces throughout the house, you can cover a poster-size piece of corrugated plastic with felt (again, dollar store material) and use the animals to make up stories on the board.

It’s my belief that, if you make it, they will come. If you buy it, they may just play with the box instead. See you at the grocery or dollar store.

Shelley Civkin, aka the Accidental Balabusta, is a happily retired librarian and communications officer. For 17 years, she wrote a weekly book review column for the Richmond Review. She’s currently a freelance writer and volunteer.

Format ImagePosted on July 7, 2023July 6, 2023Author Shelley CivkinCategories LifeTags Accidental Balabusta, children, cooking, crafts, kids
A foolproof eggplant recipe

A foolproof eggplant recipe

Rebbetzin Chanie’s eggplant dish is “super-easy and ridiculously yummy.” (photo by Shelley Civkin)

A recent Shabbat dinner with Rabbi Yechiel and Chanie Baitelman and a few other guests was like waking into the light after being in darkness for three years. The isolation brought on by COVID, compounded by health issues leaving us feeling vulnerable, resulted in Harvey and I spending every Shabbat and all Jewish holidays by ourselves for three long years. It was our first Shabbat “out in the open” and we couldn’t have asked for a warmer or more welcoming environment.

Observant, but not very much so, Harvey and I are used to lighting Shabbat candles, and he always reads Eishes Chayil (Woman of Valour) to me. But that’s pretty much all we do on Shabbat. So it was truly a delight to spend it with the rabbi and Chanie, their two youngest children, and a few others. The Shabbat rituals added much to the sanctity of the evening, and reminded me why we do what we do, and why Jews are G-d’s chosen people. The singing, the chatting – really, just the feeling of being “home” – all contributed to this intimate and freilach (joyous) evening. And then there was the food.

No Jewish celebration is complete without spectacular homemade food. And Chanie hit all the right notes on that count. We started out the meal with a bunch of small dishes, including the best eggplant dish I’ve ever had the pleasure of meeting. There was also baked fish, another eggplant dip, a gorgeous salad, freshly baked challah and an Israeli couscous salad. And that was just to start! Having been a guest at their home before, I knew that this was just the beginning, and that I should pace myself. Juicy, delicious Shabbos chicken followed, along with zucchini and onion quiche.

The star of the show for me, though, was Chanie’s Middle Eastern eggplant dish, which is the stuff that Jewish dreams are made of. People always say delicious food is “to die for!” but, really, the saying should be: “It’s to live for!” Naturally, I asked Chanie for the recipe and she admitted that she doesn’t really use one, which is why it tastes different every time she makes it. I tried to nail her down, as I wasn’t about to let this amazing dish get away. A couple of days later, and after a lot of question-asking and prodding, she relented and texted me the ingredients. No measurements. Just ingredients. Her directions to me were simple: “Just taste it as you go along.” Not unlike what our grandmothers did. But this is not something you say to someone like me, who’s a bit compulsive, and a stickler for a recipe. Needless to say, I was a bit flustered by the meagre directions.

Not to be daunted by a challenge though, I did what I rarely do – I winged it. With great trepidation, I might add. Chanie’s eggplant dish was so spectacular that I just knew I had to figure it out on my own, no matter how many tries it took. And, whaddaya know, I hit it out of the ballpark on the first go! And now, as humbly as possibly, I will share (to the best of my memory) the ingredients and measurements that I recall, and if it doesn’t work out … well … just try again. All measurements are approximate. As if that helps.

REBBETZIN CHANIE’S EGGPLANT
(makes enough for four as a side dish)

3 smallish eggplants, cubed and with skin on
juice of 1 lemon
1/2 tsp cumin
1/2 tsp paprika
1/2 tsp smoked paprika
2-3 cloves minced garlic
2 heaping tbsp tomato paste
2 heaping tbsp honey or date syrup (I used honey)
large handful of parsley, finely chopped
pepper to taste

Dice unpeeled eggplants into small cubes and sprinkle generously with olive oil. Don’t be afraid to use a lot of oil. Then sprinkle with salt. Bake at 375°F. until very soft, about 40 minutes. Turn it halfway through.

While the eggplant is baking, fry up minced garlic in a good amount of olive oil. Once it starts to brown, turn the heat down and add lemon juice, cumin, paprika, smoked paprika, tomato paste, honey or date syrup, and pepper. As you fry it up, taste it and adjust accordingly. There won’t be a lot of sauce but, trust me, the flavour is enough to permeate all of the eggplant.

Once the eggplant is nice and soft, mix it in with the garlic and tomato paste mixture, add the parsley, and you’re good to go. This dish is spectacular on its own, or with challah or focaccia to soak up the oil. It’s great served hot but it’s even better served cold the next day, once the flavours have had a chance to meld and marry. My husband declared it “company worthy” and hopes I’ll make it daily. Nice try, honey.

What I like about this dish is that it’s super-easy and ridiculously yummy – it’s sweet, smoky and slightly tart all at once. It’s also very oily, but that’s part of its Middle Eastern charm. You can adjust the amount you use, as eggplant tends to suck it up like a sponge. In our household though, you can never have enough olive oil.

I served this eggplant dish with steak, but it would go well with pasta, fish, rice, chicken or pretty much anything. Chanie told me that she makes up a big batch of the garlic tomato paste mixture and freezes it, so that when she’s in the mood for eggplant, all she has to do is cube the eggplant, bake it and add it to her defrosted pre-made “sauce” mixture. If I were a store or a restaurant, I’d put a money-back guarantee on this dish. Short of outrageously over-spicing it, you really can’t go wrong. I mean, it’s eggplant after all. The nightshade superstar. Enough said. Go dice your eggplant and call me when it’s done. I won’t take no for an answer. I’ll even bring the bread.

Shelley Civkin, aka the Accidental Balabusta, is a happily retired librarian and communications officer. For 17 years, she wrote a weekly book review column for the Richmond Review. She’s currently a freelance writer and volunteer.

Format ImagePosted on June 9, 2023June 8, 2023Author Shelley CivkinCategories LifeTags Accidental Balabusta, Chanie Baitelman, cooking, eggplant, Judaism, lifestyle, Shabbat
Healthy food Harvey won’t eat

Healthy food Harvey won’t eat

You can really put anything in a quinoa salad, depending on your taste. (photo from flickr / Marco Verch Professional Photographer)

Until recently, I had a very casual relationship with healthy foods. Neither me nor the veggies/tofu/fruit could commit. But now we’re besties. Not that I have eschewed chips, Cheezies and chocolate, by any means. I’m just branching out.

For decades, my meals could be described as culinary grenades just waiting to go off. If I tried to make something new, it was sure to result in one of two things: either Harvey or I would end up with food poisoning, or the meal would be so unspeakably disastrous that we’d have to go out for dinner or order in.

Then the pandemic happened. With restaurants closed and/or my anxiety in high gear about being around crowds who might spread COVID, we ate at home almost all the time. It came down to this: I could spend eternity eating the same three dishes, or I could start expanding my culinary repertoire (I use the word repertoire lightly). In hindsight, I could have boycotted the kitchen entirely. As it was, I was relying on Harvey to pick up the slack more than half the time, and I didn’t feel that was fair. What I’m trying to say is that I basically kitchen-shamed myself. Looking at friends’ food posts on Instagram and Facebook made me feel unspeakably inadequate. How had I gotten to my late 60s without being able to easily conjure up at least a dozen go-to dishes for dinner on any given night? That’s a rhetorical question, by the way.

Whereas I used to consider my dearth of cooking skills a life choice, now I realize how essential those skills are. Plus, I got tired of eating chicken, beef, fish. There are only so many ways to jazz up that same limited rotation. It was getting old, and so am I.

Enter quinoa, or what a nutritionist I knew once described as “the most complete non-animal protein on the planet.” It’s high in fibre, low in sodium, high in calcium, potassium, iron, magnesium and zinc. And it’s naturally gluten-free. Basically it’s a superfood. Just remember to rinse and drain quinoa well before cooking in order to remove any saponins, which have a bitter, soap-like taste.

It took awhile to be convinced of quinoa’s intrinsic goodness, especially given its unusual smell while cooking. But little by little I warmed up to it, and now it’s indisputably one of my favourite foods. Harvey, however, would rather have the combo platter of a colonoscopy and a dental implant than eat quinoa. We all make choices.

One of my favourite quinoa dishes is a simple salad that could also serve as a main dish, depending on how much stuff you add to it. To make enough for two solid meals, I’ll use about two cups of cooked quinoa (Google directions for cooking), diced cucumber, fresh blueberries and fresh mint, cut up. In the summer I add diced up mango. I’ve also been known to add canned chickpeas, diced tomatoes and pine nuts. I’ve seen recipes that include bell peppers, red onion, grated carrots, dried cranberries, and a variety of herbs. You can really put anything in there, depending on your taste. To boost the animal protein content, you could add tuna, salmon or chicken as well.

What elevates this salad to the next level is the dressing you put on it. In my pre-cooking days, I used to think that olive oil was enough to render any salad palatable. Expanding my dressing and sauces repertoire has resulted in much yummier salads. Here are four dressing options I use regularly.

HONEY MUSTARD DRESSING

1 tbsp grainy Dijon mustard
2 tsp honey
2 tbsp olive oil
juice of 1/2 a lemon
salt and pepper to taste

Combine mustard, honey and lemon juice and whisk them together. Then whisk in the olive oil. Voila!

SESAME GINGER DRESSING

1/2 tsp ground ginger
1 1/2 tbsp maple syrup
2 1/2 tbsp soy sauce
2 tsp white vinegar or rice wine vinegar
1 tsp sesame oil
1/2 tsp sesame seeds
juice of 2 limes

Whisk all ingredients together and enjoy this savoury dressing.

LEMON DRESSING

1/4 cup olive oil
grated zest from 1 medium lemon
1 tbsp fresh lemon juice
1 medium clove garlic, minced
1 tsp grainy Dijon mustard
1 tsp honey
1/2 tsp kosher salt
1/4 tsp ground black pepper

Whisk ingredients together and enjoy!

CAPER VINAIGRETTE

1 tbsp red wine vinegar
1 tsp grainy Dijon mustard
1 clove garlic, minced
2 tbsp capers, drained and chopped (or more, to taste)
3 tbsp finely chopped flat leaf parsley
1/4 cup plus 2 tbsp olive oil
1/2 tsp ground pepper
1/4 tsp salt

Combine all ingredients. This one is a very versatile dressing. I often use it on baked salmon and it’s delicious. It works well on chicken, too. I love capers, so I always add loads, but that’s a taste thing.

Check out Food and Wine magazine’s online suggestions for five ways to dress a quinoa salad at foodandwine.com/grains/quinoa/5-ways-dress-quinoa-salad. They venture into more unusual flavour profiles than I’d be willing to try, but for those of you who are more culinarily adventurous, go for it!

Quinoa is the true tabula rasa of foods, since it’s rarely eaten on its own, and it’s never usually the star of the show. It gets its street cred from its supporting cast of veggies, fruits, proteins and dressings. It can be cast for breakfasts, lunches, dinners or snacks, and it’s equally happy served hot or cold. Unlike some prima donna foods, it doesn’t complain about about uninvited guests. It plays well in the sandbox, and you rarely have to call its parents to come pick it up from school for bad behaviour. I have only good things to say about quinoa, even though it sometimes gets an undeservedly bad rap. And, bonus, it lasts well in the fridge for a good week, unadorned. Case closed. Eat your quinoa.

Shelley Civkin, aka the Accidental Balabusta, is a happily retired librarian and communications officer. For 17 years, she wrote a weekly book review column for the Richmond Review. She’s currently a freelance writer and volunteer.

Format ImagePosted on May 12, 2023May 11, 2023Author Shelley CivkinCategories LifeTags Accidental Balabusta, quinoa, salads

Polenta fries & dipping sauces

My new BFF, the Air Fryer, has been working a shocking amount of overtime lately. So much so that I’m expecting a call from the Air Fryer’s union any moment, complaining about my employment practices.

Harvey and I often use the Air Fryer three times a day. We might make hardboiled eggs for breakfast, marinated tofu for lunch (me, not Harvey – he’d rather stick forks in his eyes than eat tofu) and, well, dinner could be anything. We cook steaks, salmon and chicken in there, make grilled cheese sandwiches, reheat leftovers and cook veggies in it. The only thing I haven’t tried in there is desserts. And cocktails. Stay tuned. I’m embarrassed to say, but our other appliances are exhibiting textbook signs of jealousy. No small wonder.

My newfound interest in cooking, coupled with our purchase of the Air Fryer, has opened up whole new vistas. The Air Fryer has inspired me to try recipes I never dreamed I’d try. For someone who could easily eat the same meal every day for a month, this is, quite frankly, a revelation.

Generally speaking, I’m the polar opposite of a culinary ambassador. I fit better into the “culinary misanthrope” or “culinary misfit” category. My father used to comment on my indiscriminate eating habits this way: “Shelley would eat out of a puddle.” It was true. As long as somebody else cooked it, I’d eat it. It didn’t matter what it was. But alas, the Air Fryer has lifted me to new heights. I now soar with the eagles and run with the wolves. I apologize for the hyperbole, but I’m so excited, I just can’t hide it. (Nor can the Pointer Sisters.)

photo - polenta fries So, as I was about to say, I’m constantly in search of new recipes  I can incorporate into my Air Fryer repertoire. This week it was polenta fries. Polenta is boiled cornmeal that can be served as a hot porridge-like dish, or it can be allowed to cool and solidify into a loaf/log that can be baked, fried or grilled. I used the pre-cooked loaf/log version because it’s more versatile. It comes in regular and garlic basil flavour and can be purchased at most grocery stores. It’s often referred to as “tubed polenta.”

Having stumbled across numerous recipes for polenta fries, I decided to make it my new food project. I looked up its nutritional value and found that it’s a good source of fibre and protein, it’s gluten-free, rich in complex carbohydrates and antioxidants, low in fat and low in calories. Win-win all around. Polenta has a very convincing personality, especially when you pair it with some yummy dipping sauces.

AIR FRYER POLENTA FRIES
18-oz (500-gram) pre-cooked polenta log
pinch of salt and pepper
paprika (optional)
olive oil spray (or just use olive oil)

  1. Cut the polenta log into french fry-slice pieces and put in a large bowl.
  2. Spray the polenta fries with the olive oil spray or drizzle with olive oil to coat them all evenly. Sprinkle with salt and pepper and paprika (optional).
  3. Place the polenta fries in the air fryer basket in a single layer, leaving space between them.
  4. Bake at 380°F for 18 to 20 minutes, or 400°F for 10 to 14 minutes. Flip the fries halfway through cooking. The outside should be crispy and the inside will be sort of creamy.
  5. Serve with your favourite dipping sauce. I made garlic aioli and lemon sauces, both of which were a big hit.

GARLIC AIOLI
1/2 cup mayonnaise
1 clove garlic minced
1 tbsp lemon juice
1/4 tsp kosher salt
2 tsp olive oil
1/4 tsp pepper

Mix all ingredients together in a small bowl and refrigerate at least 30 minutes before serving.

LEMON DIPPING SAUCE
1/2 cup mayonnaise
2 tbsp lemon juice
2 tsp finely grated lemon zest
1 tsp Dijon mustard
salt and pepper to taste

Mix all ingredients together in a small bowl and refrigerate for 30 minutes before serving.

MINT DRESSING
1/2 cup extra virgin olive oil
1/2 cup fresh lemon juice or lime juice
1/4 cup packed fresh mint leaves
3 tbsp honey or maple syrup
1 tbsp Dijon mustard
2 cloves garlic, minced
1/4 tsp fine sea salt
10 twists of freshly ground black pepper

In a food processor (or Magic Bullet), combine all of the ingredients and blend until smooth. Add more salt and/or pepper if necessary.

This dressing will keep well, covered and refrigerated, for up to one week. It’s thinner than the dips, but it’s delicious with everything – it’s great on salads, orzo, tomatoes and cucumber, with parmesan cheese, goat cheese or feta cheese.

While I’m on the topic of dips and sauces, I have to share one of my favourite and simplest recipes – lemon caper butter. I mostly use this on salmon but you could douse any fish in it and not regret it.

LEMON CAPER BUTTER
4 tbsp butter
1 clove garlic minced
2 tsp capers, drained (I always add more)
2 tbsp fresh lemon juice
1 tsp lemon zest
1-2 tsp chopped parsley
salt and pepper to taste

In a small saucepan melt butter over medium heat. Once the butter has melted, add the garlic, capers, lemon zest and lemon juice. Cook for two minutes, then season to taste with salt and pepper.

Despite all evidence to the contrary, I can cook. I’m not ashamed to admit that there have been some culinary casualties over the years, but mostly I’ve managed to keep myself and Harvey well fed and out of the ER. And, irony of ironies, the pandemic has given me the opportunity and impetus to try new recipes and new foods, and for that I’m grateful. I’m also grateful for the plethora of restaurants that do takeout and delivery. Never underestimate the power of a great slice of thin crust pizza. Or Chinese food and a movie. No, wait. That’s what we do on Christmas. Now I’m confused. Or maybe I’m Confucius. Whatever. Bon appetit.

Shelley Civkin, aka the Accidental Balabusta, is a happily retired librarian and communications officer. For 17 years, she wrote a weekly book review column for the Richmond Review. She’s currently a freelance writer and volunteer.

Posted on February 24, 2023February 22, 2023Author Shelley CivkinCategories LifeTags Accidental Balabusta, cooking, food, recipes

Posts pagination

Previous page Page 1 Page 2 Page 3 … Page 7 Next page
Proudly powered by WordPress