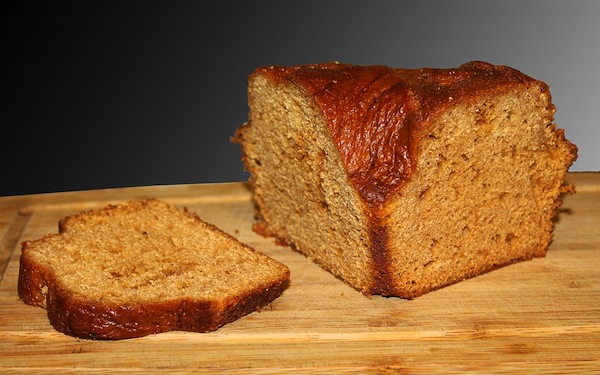
Tori Avey’s Honey Apple Bundt Cake before being dusted with sugar powder or decorated with icing. (photo by Shelley Civkin)
Rosh Hashanah may well be in the rearview mirror, but Tori Avey’s Honey Apple Bundt Cake (toriavey.com/honey-apple-cake) is guaranteed to be a staple on your dinner table, no matter the time of year. It’s definitely not your typical yontif honey cake that doubles as a brick. Filled with shredded apples, it not only satisfies your sweet tooth but is off-the-charts moist.
Except for the apple-shredding part, which I do by hand, this recipe is fast and easy. I used to have a food processor with a shredder attachment but I never used it, so I gave it to my niece. I also used to have a Bundt pan, but I rarely used it, so I gave it to my niece. She now has an extensive collection of high-end small kitchen appliances. And I borrow from her. My point is that this cake was a colossal hit at my Rosh Hashanah dinner table, and is one recipe I’ll be making on the regular. You’re welcome.
HONEY APPLE BUNDT CAKE
3 large eggs
3/4 cup honey
1/2 cup white sugar
1/4 cup light brown sugar
1 1/4 cups canola oil
1 1/2 tsp vanilla
3 cups all-purpose flour
1 tsp baking powder
1 tsp baking soda
1 1/2 tsp cinnamon
3/4 tsp salt
1/4 tsp allspice (optional)
dash ground cloves (optional)
4 apples (peeled, cored, shredded)
3 tbsp powdered sugar
Preheat oven to 325˚F. Peel, core and shred your apples.
In a large mixing bowl, beat the eggs until they’re frothy. Whisk in the honey, white sugar, brown sugar, oil and vanilla. In a separate medium-sized bowl, mix the flour, baking powder, baking soda, cinnamon, salt and spices (optional) together. Incorporate the flour mixture into the liquid, and stir to blend. Fold in the shredded apples (I used Ambrosia or Fuji but you can use any kind you like) and their juice.
Spray your nine-inch Bundt pan with cooking spray, making sure to evenly coat the entire inner surface. Pour the batter into the pan. Since Bundt pan sizes vary (I use a 10-to-15-cup pan), make sure the batter fills the pan three-quarters full or less – don’t fill beyond that or your cake might overflow during baking. Use a spatula to gently smooth the batter on the top so it’s flat and even all the way around the pan.
Bake the cake for 75 to 90 minutes. If you’re using a dark-coloured Bundt pan, it may bake faster, so start checking at 50 minutes. When the edges darken and pull away from the sides of the pan, and the cake is brown all the way across the top, insert a toothpick (or wooden shish kabob skewer) into the thickest part of the cake. If it comes out clean, it’s done. It’s a very moist cake, so it’s easy to undercook it. Bake it a little longer if you’re unsure, but not too long or it’ll dry out.
Let the cake cool for 10 minutes, then invert it onto a flat plate. Tap the Bundt pan gently to release the cake, then let the cake cool completely before you dust it with powdered sugar. Since the cake is moist, it tends to soak up the powdered sugar, so only add it right before serving. I put three tablespoons of powdered sugar into a small handheld mesh sieve and sprinkled it on top of the cake by tapping the sieve. If there’s any cake left over, keep it in the fridge, covered.
If you happen to be a fan of drizzled icing, this next part is for you. To make an icing, sift one cup of powdered sugar into a mixing bowl. Add a quarter teaspoon of vanilla extract and half a tablespoon of water or non-dairy creamer. Whisk the sugar and liquid to blend, adding the liquid very slowly, until it just comes together. Add additional liquid by half teaspoonfuls, mixing constantly, until the mixture has the texture of very thick honey. When you pull a spatula through the icing and it takes a few seconds for the gap to close again, the texture is right.
Pour the icing into a sealable plastic bag. Close the bag, leaving a small bit open to vent, and push the icing towards one lower corner of the bag. Cut the very tip of that corner off the bag. Squeeze gently to drizzle the icing over the cake. Let the icing dry completely before serving – this takes 30-60 minutes. Slice and enjoy!
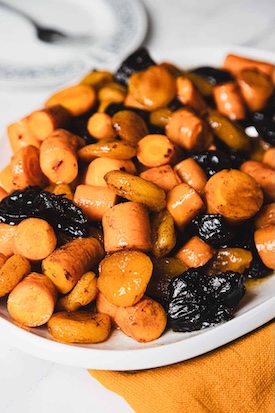
Another new Rosh Hashanah recipe I tried convinced me that not all tzimmes are created equal. Ksenia Prints’ Russian Jewish Carrot Tzimmes (immigrantstable.com/my-grandmas-russian-jewish-carrot-tzimmes) is definitely a cut above and checks all the boxes for rich depth of flavour. Some of my Rosh Hashanah guests actually asked if they could take some home!
RUSSIAN JEWISH CARROT TZIMMES
2 lbs carrots peeled & cut into 2-inch pieces
7 oz pitted prunes
7 oz dried apricots
zest of 2 oranges, in strips
juice of 2 oranges
4 tbsp honey
1/4 cup brown sugar
3 tbsp butter
1 tsp ground cinnamon
1/2 tsp ground ginger
1/4 tsp ground cardamom (optional)
salt to taste
Preheat oven to 350°F.
Blanch carrots in boiling salted water for 5 minutes, then drain.
In a large ovenproof dish, combine carrots, prunes, apricots and orange zest.
Combine orange juice, honey, brown sugar, melted butter, cinnamon, ginger and cardamom (optional), and pour this over the carrot mixture. Toss to coat.
Cover the dish with foil and bake for 30 minutes. Remove foil, stir, and continue baking uncovered for 30 to 40 minutes, until carrots are tender and the sauce has thickened and reduced to a glaze. Season with salt to taste and let rest for 10 minutes before serving.
The orange zest strips become almost candied and the glaze is sweet and slightly spicy. This dish freezes perfectly and offers a deep, rich flavour that only gets better with time. Seriously. You can make it in advance, like I did, then defrost and reheat it in the microwave. No one was the wiser. And everyone was happy.
The $64,000 question is this: Why do we save these delicious recipes only for holidays? Get thee to the oven now!
Shelley Civkin, aka the Accidental Balabusta, is a happily retired librarian and communications officer. For 17 years, she wrote a weekly book review column for the Richmond Review. She’s currently a freelance writer and volunteer.